Although this week has been shorter than usual (or maybe because of that) I’m already looking forward to the weekend to wind down and relax. Apparently the weather will be very nice but even if it won’t I got a new corner in my home to relax. Drink some coffee and read a book.
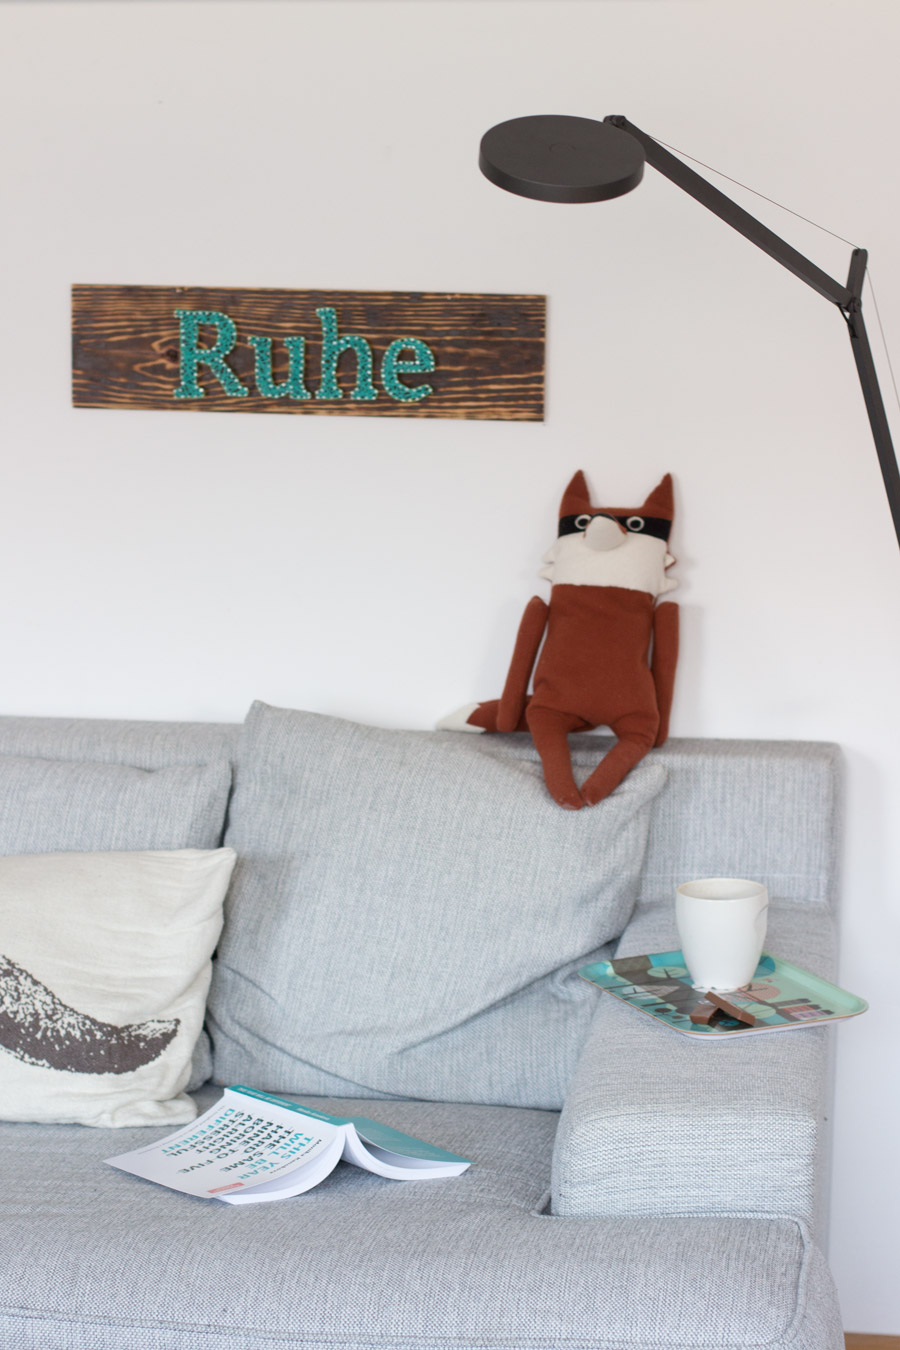
I made this string art wall decor as part of my styling job for Servus Magazin. I hung it over my couch to remind me to take a breath and relax from time to time. If you’re not familiar with German (no shame there!) it’s best translated with tranquility which would be a horrible word to put on a board with string art.
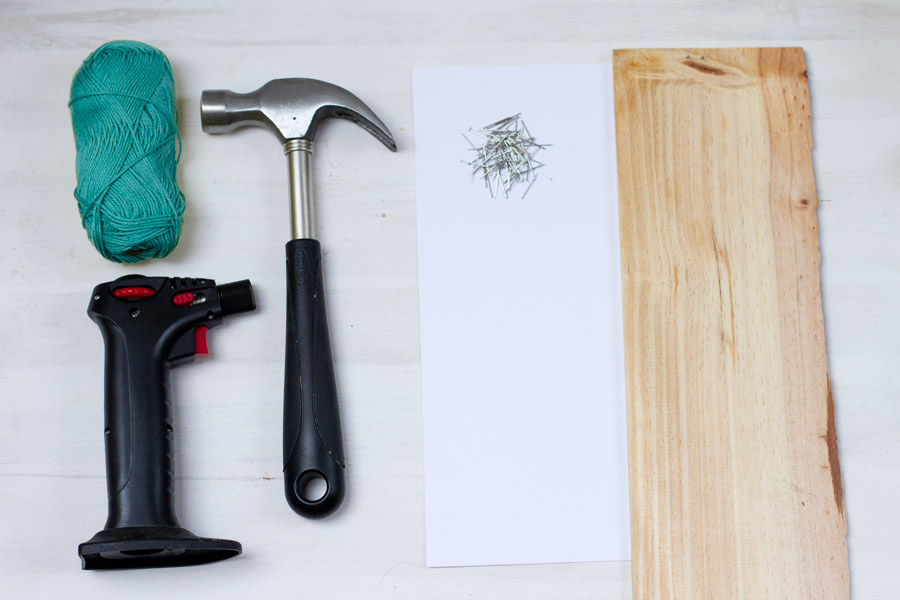
All you need is:
– a board
– a burner
– paper templates of the word
– double-sided adhesive tape
– nails
– a hammer
– thread
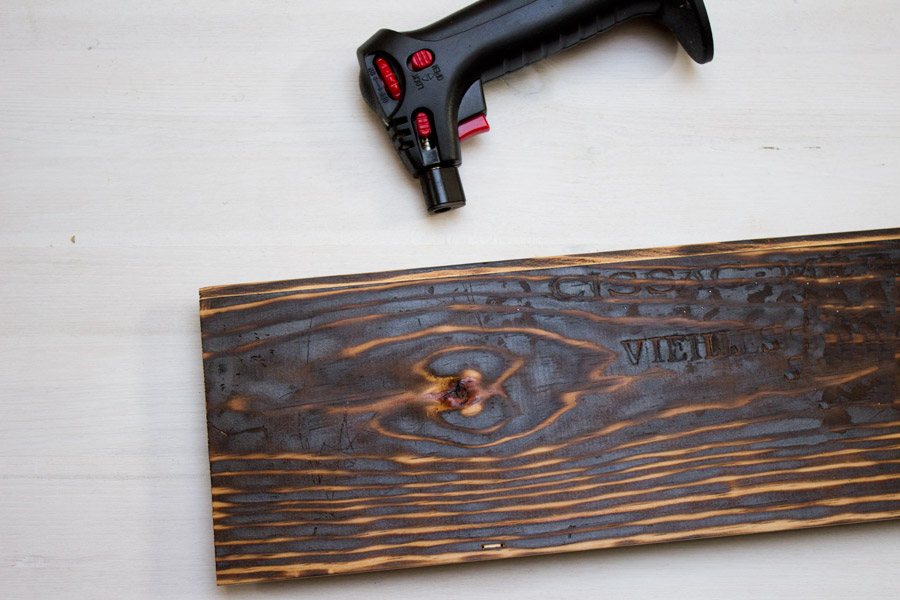
Did you see that I upcycled some wood there? It’s a part of the lid of a wine crate. I love wooden wine boxes. You might have noticed here and there. I burned my wood before using because I wanted it to look more used and darker. I acutally bought this burner to make creme brulée. You just never know what you end up using your tools for, right?
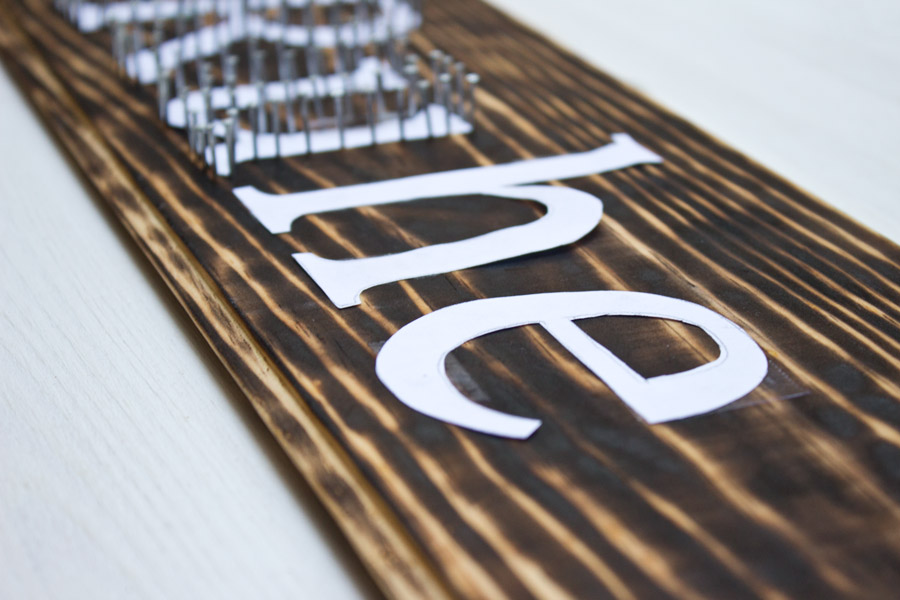
Now cut the letters that you’d like to make out of paper and stick it on the wood with the adhesive tape. Hammer the nails around the paper letters with about 3 mm space between each nail.
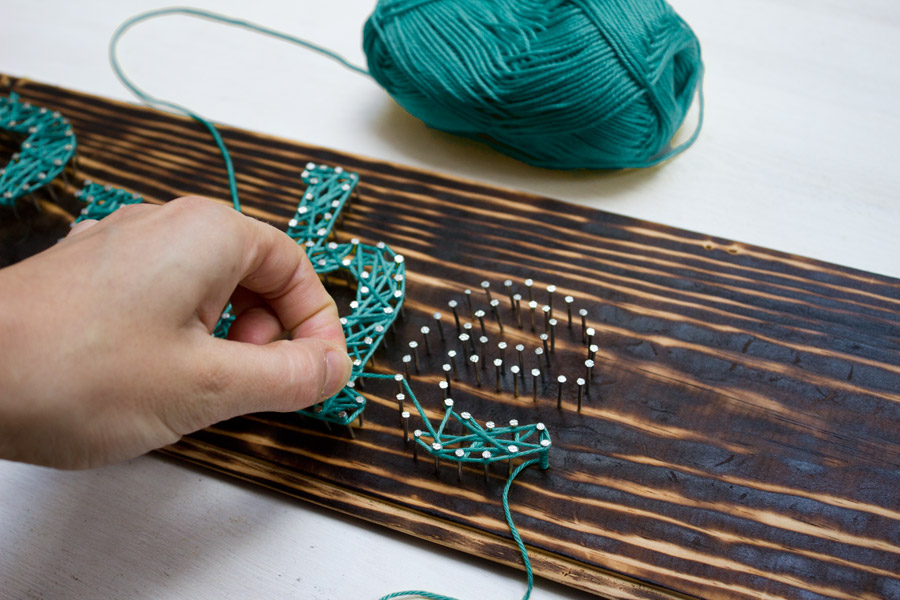
Once you’re done with that. Just wrap the string around the nails and voilá! You made it!
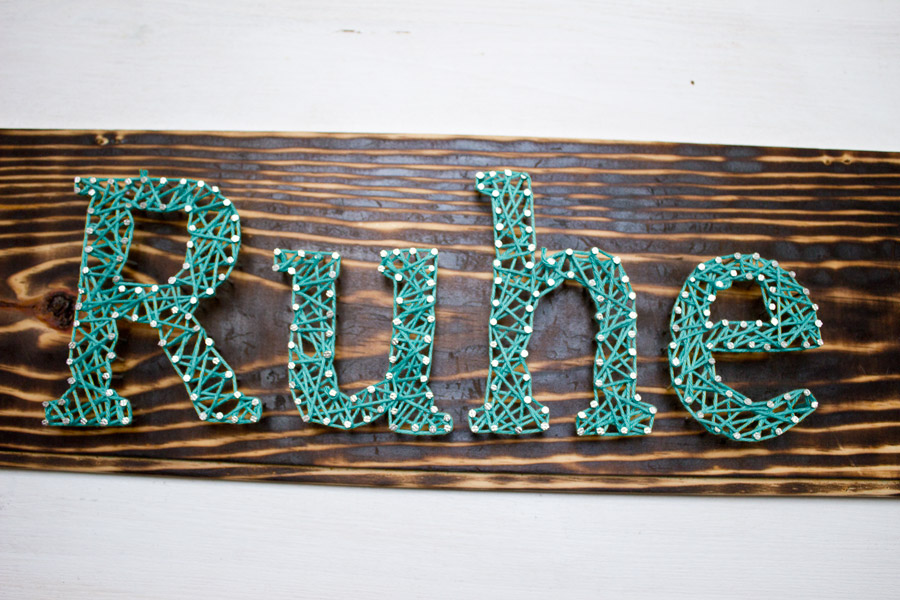
See how relaxed I look pretending to read a book? And do you remember this fox I made? It normally sits in my bedroom but I thought I change it up a little bit.
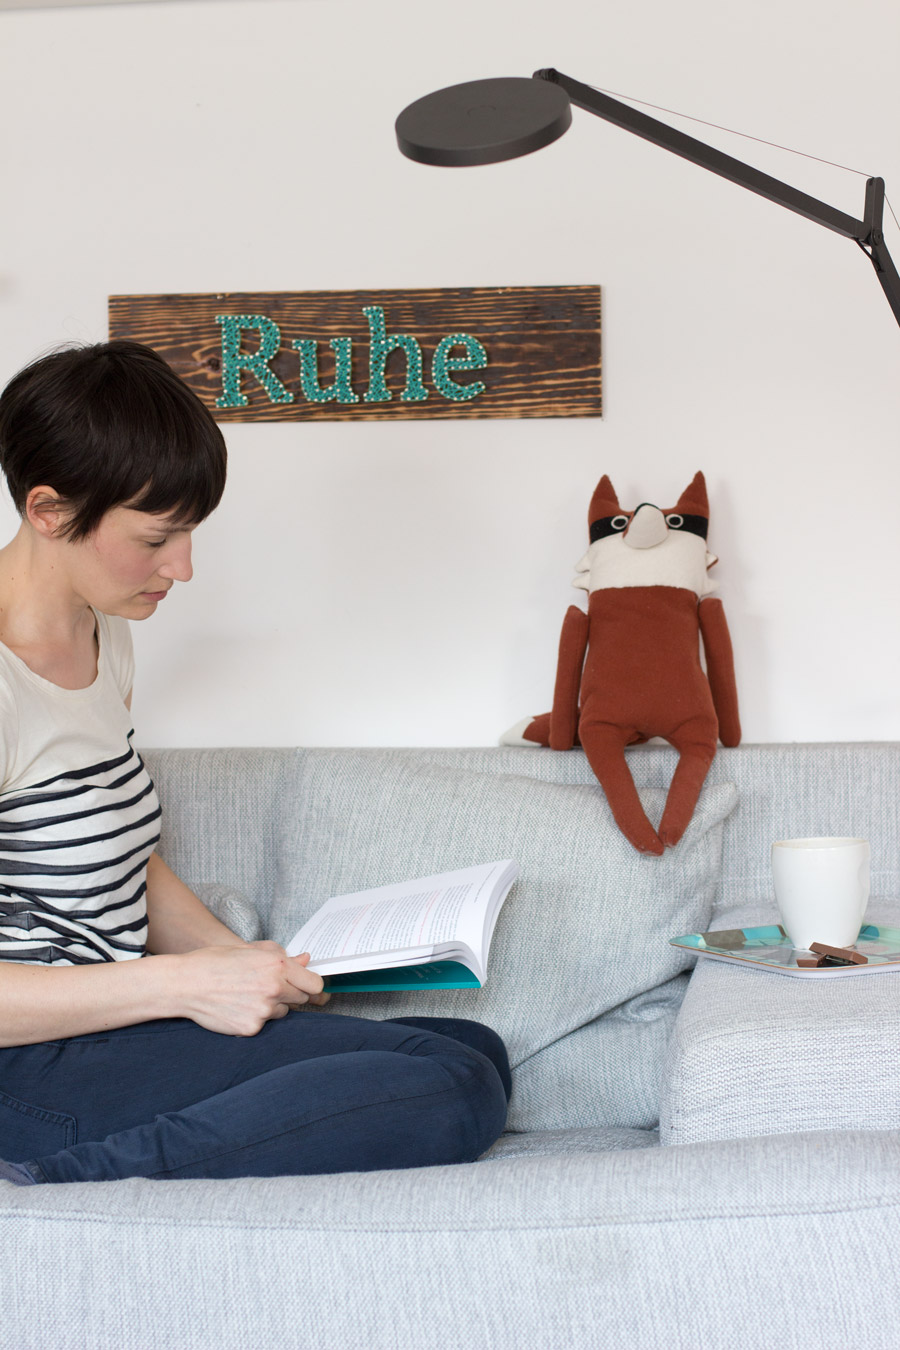
At the moment I have a hard time crawling out of bed. I feel so tired that I drink coffee in the morning (normally more an afternoon-routine for me).
Do you feel the same? How do you recharge our batteries?
Now. Carry on!


Love this. Such a clever idea Sarah. I never would have thought to use a creme brulée torch on wood!
Wow, such an amazing idea! Going to have to try this! Is there a certain pattern to wrap the string on with?
You’re very kind, Iola. I just wrapped the string randomly. Just make sure to only use short ways (nails that are closer together) as it will make a better pattern and to keep it a little wild. 🙂
Thanks, i’ll try that x
Das ist eine super Idee! Das muss ich ausprobieren!
Mach das! Es ist wirlich einfach… Wenn du es auf Social Media teilst, kannst du bitte den Hashtag #lwim verwenden? Dann kann ich es mir ansehen. Das würd mich sehr freuen!
I love your blog! We are going to do names with string art!
Thank you, Laurie. Names are a good idea. Where do you hang them?
[…] Look What I made […]
Maybe this is a weird question, but what font did you use? I absolutely love the lettering!
Hi Cassie,
that’s not an weird questions. I actually looked long and hard to find the right one. I think I used Cambria. (Sorry, I didn’t save it.)
[…] DIY String Wall Art from Look What I Made […]
[…] magazine Servus Magazin I made this nail art sign. (You can find the tutorial to make your own here.) I took it home and it marks now my reading nook and reminds me that it’s important to wind […]
[…] all year favorite was this pasta storage tins I made to mark my reading spot. I still remember sitting on the floor and hammering all the nails […]
[…] your own string art with this thorough tutorial from Look What I Made. You’ll need a slab of wood, lots of nails and some colorful yarn to create a piece of […]
[…] Tutorial cuadro de hilo nombre […]
[…] 1. Wall Art Decor […]
[…] 1. Wall Art Decor […]
[…] DIY String Art Wall Decor from look-what-i-made.com […]
[…] 8. String Art […]
[…] DIY String Sign | Look What I Made […]
[…] DIY string art wall decor. | LOOK WHAT I MADE. – Make a typography inspired DIY string art sign with just any word you like. I chose the german word for tranquility to remind me to take a breath, read a good book. […]
[…] | This DIY string art that shows you exactly how to make it with no previous […]
[…] all year favorite was this pasta storage tins I made to mark my reading spot. I still remember sitting on the floor and hammering all the nails […]
[…] Tutorial: look-what-i-made […]
[…] a template, double-sided tape, nails, a hammer and thread. If you like the finish featured on look-what-i-made you’ll also need a burner in order to reproduce the […]
[…] a template, double-sided tape, nails, a hammer and thread. If you like the finish featured on look-what-i-made you’ll also need a burner in order to reproduce the […]
[…] a template, double-sided tape, nails, a hammer and thread. If you like the finish featured on look-what-i-made you’ll also need a burner in order to reproduce the […]
[…] a template, double-sided tape, nails, a hammer and thread. If you like the finish featured on look-what-i-made you’ll also need a burner in order to reproduce the […]
[…] DIY String Wall Art from Look What I Made […]
[…] what […]
The convenience of using a VCC virtual card cannot be overstated. For online shoppers and frequent travelers, this innovative financial tool offers unparalleled flexibility and security. A VCC virtual card works by generating a unique card number for each transaction, which means that your actual card details are never exposed to potential fraudsters. This adds an extra layer of protection against unauthorized charges, providing peace of mind when making purchases on unfamiliar websites or while traveling abroad. Moreover, these cards can be easily managed through various apps, allowing users to set spending limits, track expenses, and even block or cancel the card instantly if needed. This combination of security and control makes the VCC virtual card an essential tool for anyone who values safe and convenient online transactions.