I’ve been wanting to make candles for a long time. I always thought it would be hard and messy. It wasn’t the first but definitely the latter – but only because I didn’t want to make regular candles where I just pour the hot wax into a glass and call it a day. I wanted to make something special. Something that might fail but could also become a hit. Something that makes me love being a DIY blogger.
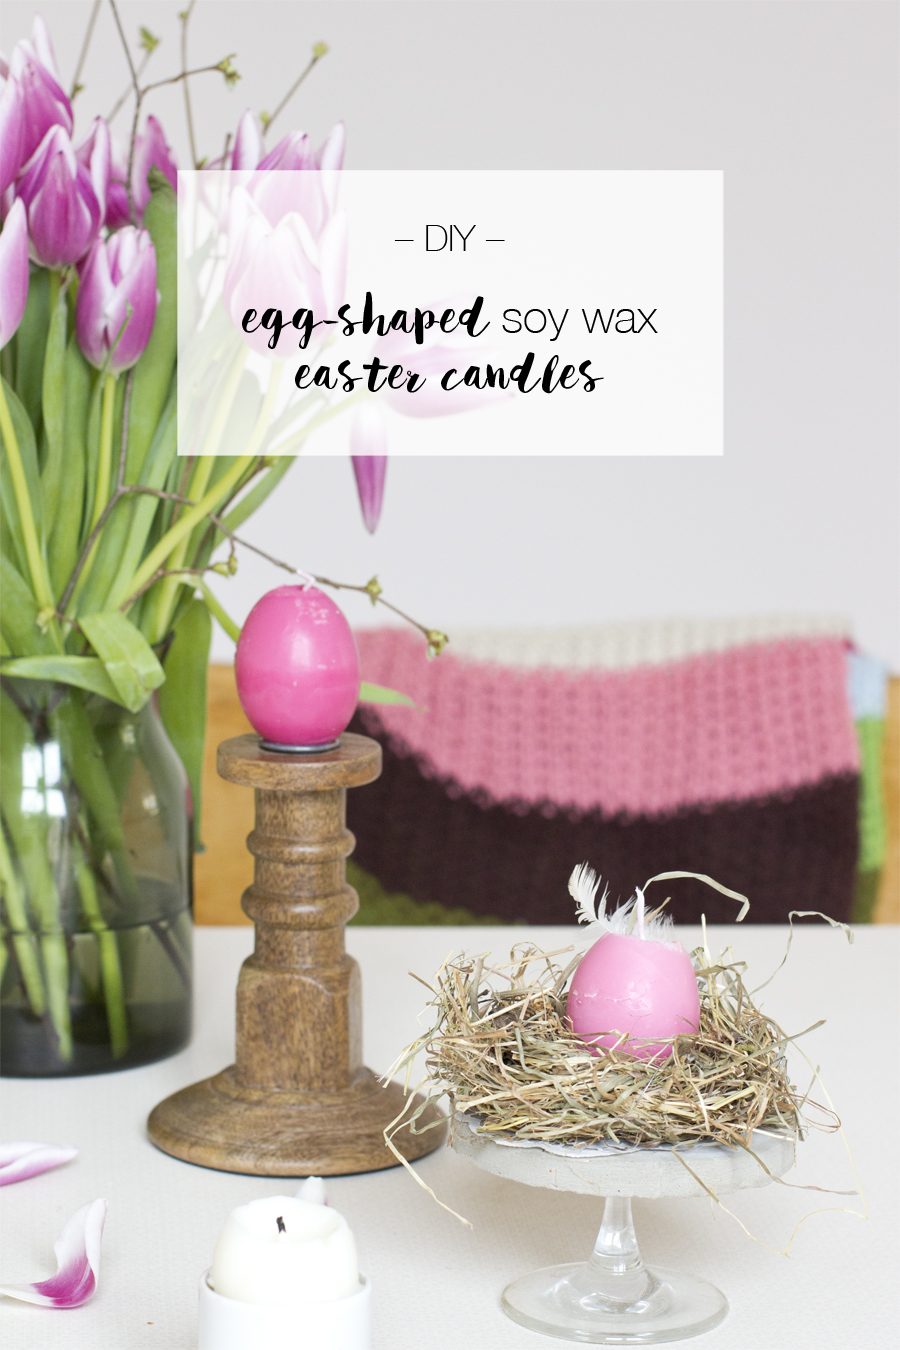
So I came up with the idea of making candles for Easter. I ordered all the equipment I needed (which is literally only wax and wicks) and blew out some eggs. Actually I do that regularly when Easter is coming – so beginning of the year – because egg shells are great for crafting (as you might have seen here). The idea was to make egg-shaped easter soy wax candles and they turned out so cute that I’m sure they’re going to be a hit! If you learn from my mistakes trials, it’s an really easy craft!
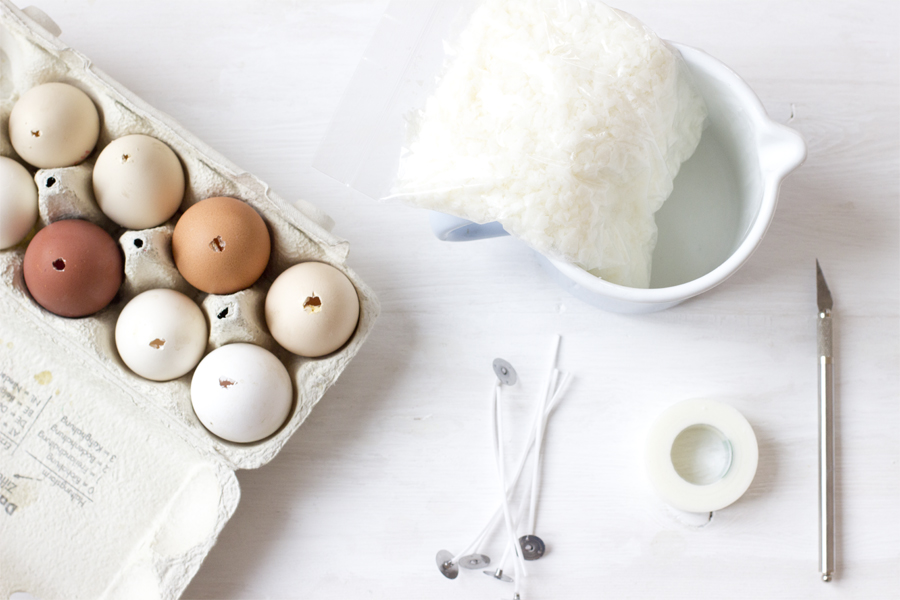
All you need is:
- soy wax
- wicks
- egg shells
- an ovenproof heating pot
- a scalpel
- tape (strong ones!)
- a bowl and ice cubes (not in the picture)
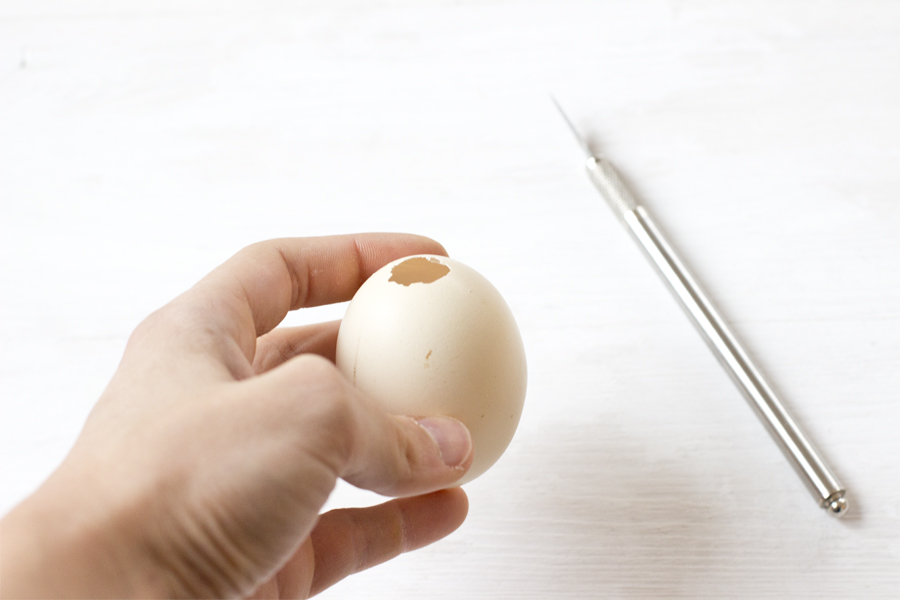
First of all we need to make the holes of the egg shells bigger. Tap with the scalpel around the little hole and make it on one side just a little bit smaller than the metal part of the wicks. Make the hole on the top of the egg about the same size. The bigger it is, the easier it is to pour the wax in – the smaller it is, the better the egg shape turns out. So it’s all about the balance.
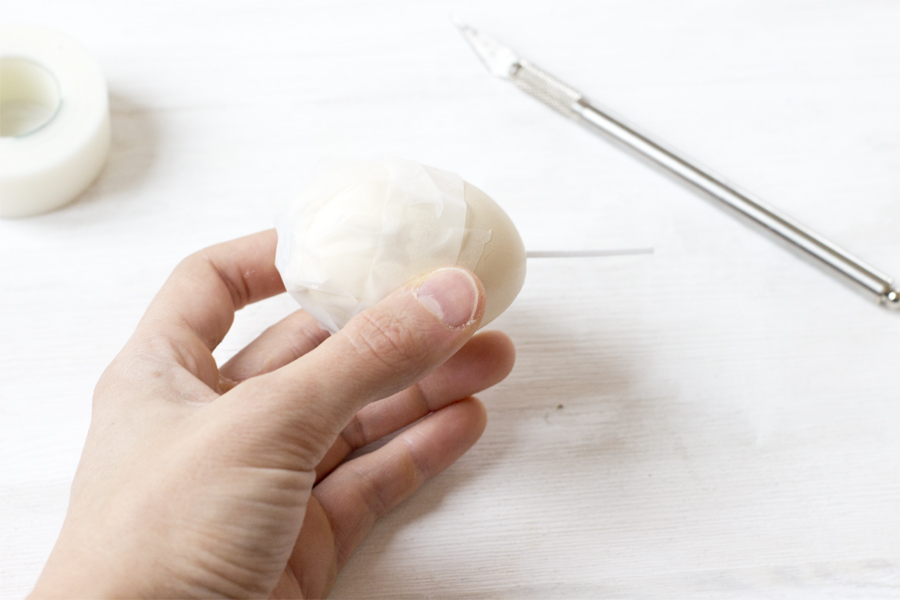
Second we prepare the egg with the wick: pull it through from the bottom to the top. The metal part should just cover the bottom hole. Now take the tape and stick it to the bottom. Make sure there are no holes!
The tape I used at first wasn’t sticky enough. It’s like the worst tape ever! My second round was with Washi tape and that worked much better! So take whatever strong tape you have at home. The egg shells will be destroyed afterwards so there’s no harm in pulling out the big tape-guns!
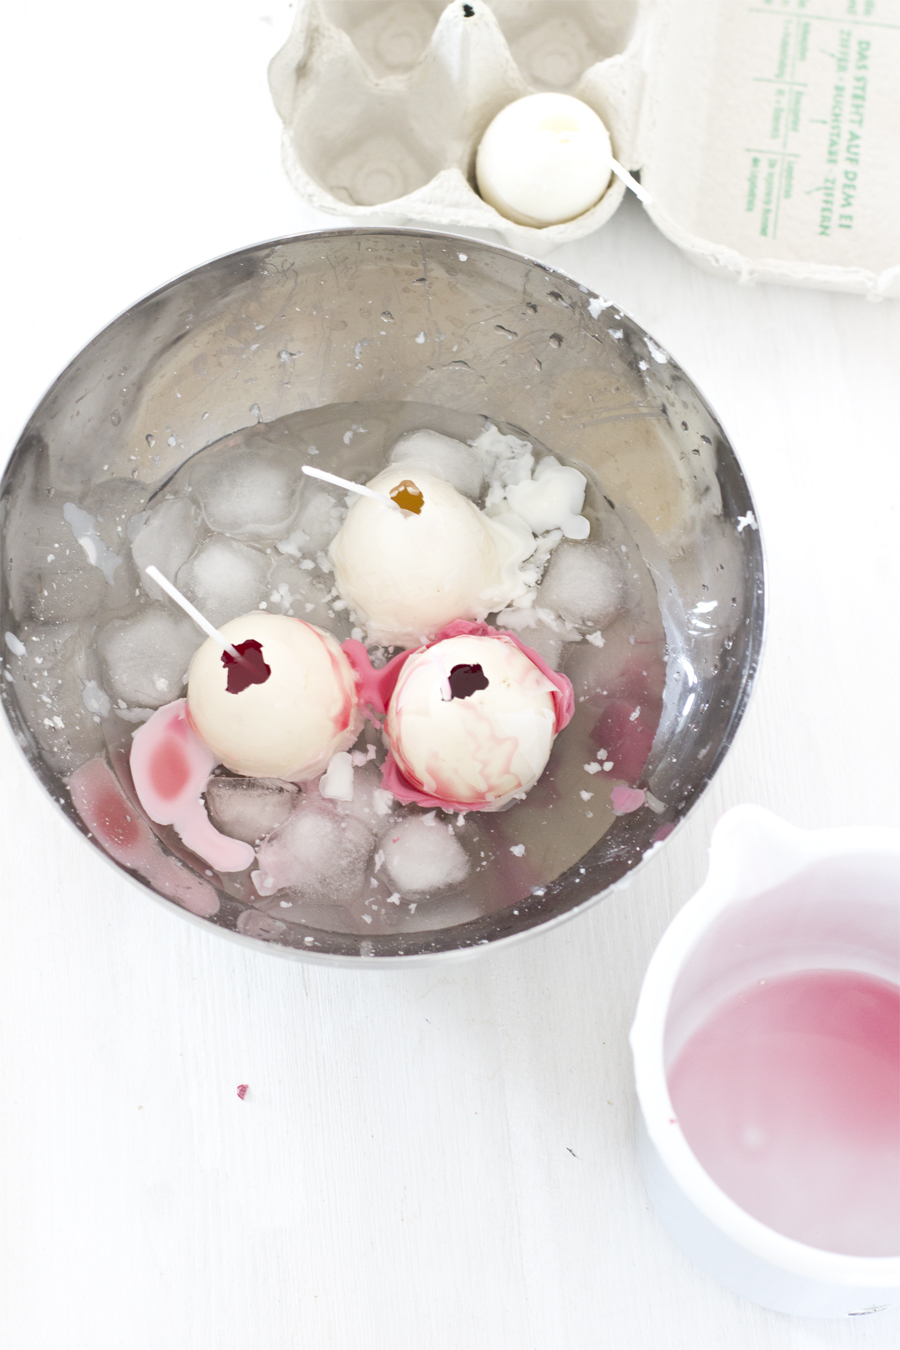
Now put the wax into the pot and heat it slowly on the oven. Take the bowl and add a little water and the ice cubes and put the prepared egg shells in. Now pour the wax into the egg shells until they are full.
As you can see in the picture above it was a messy business first but once I used a good tape there was no wax spilling out! But I want to be honest with you and that means also – showing the good, the bad and the ugly.
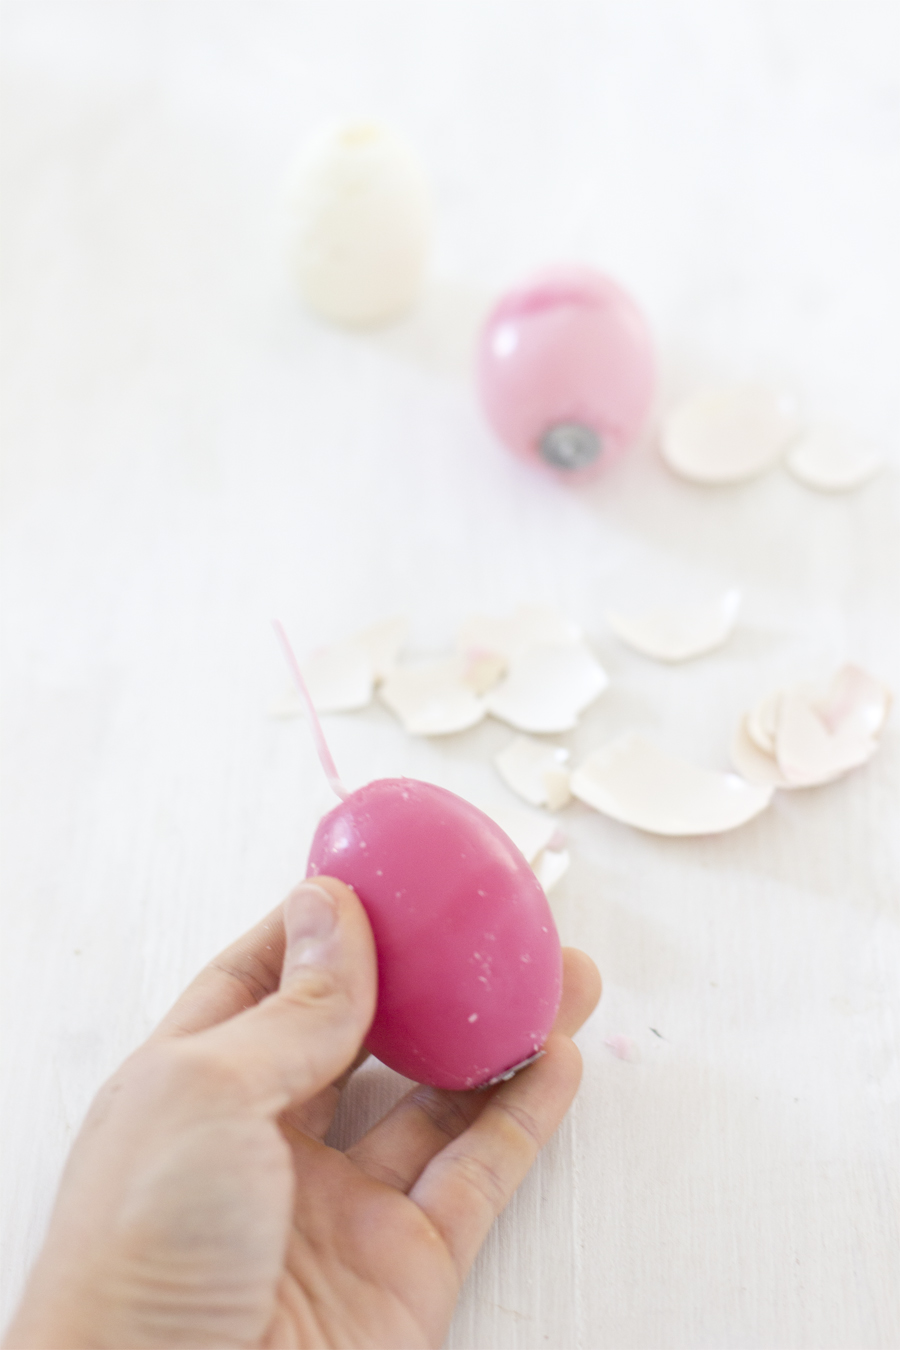
Now put the aside and let them harden completely. Once they are, you can peel off the egg shells and tape and voilá!

If you have troubles peeling, put the egg into the freezer for half an hour, this will shrink the soy wax candle just a bit and it will be easy!
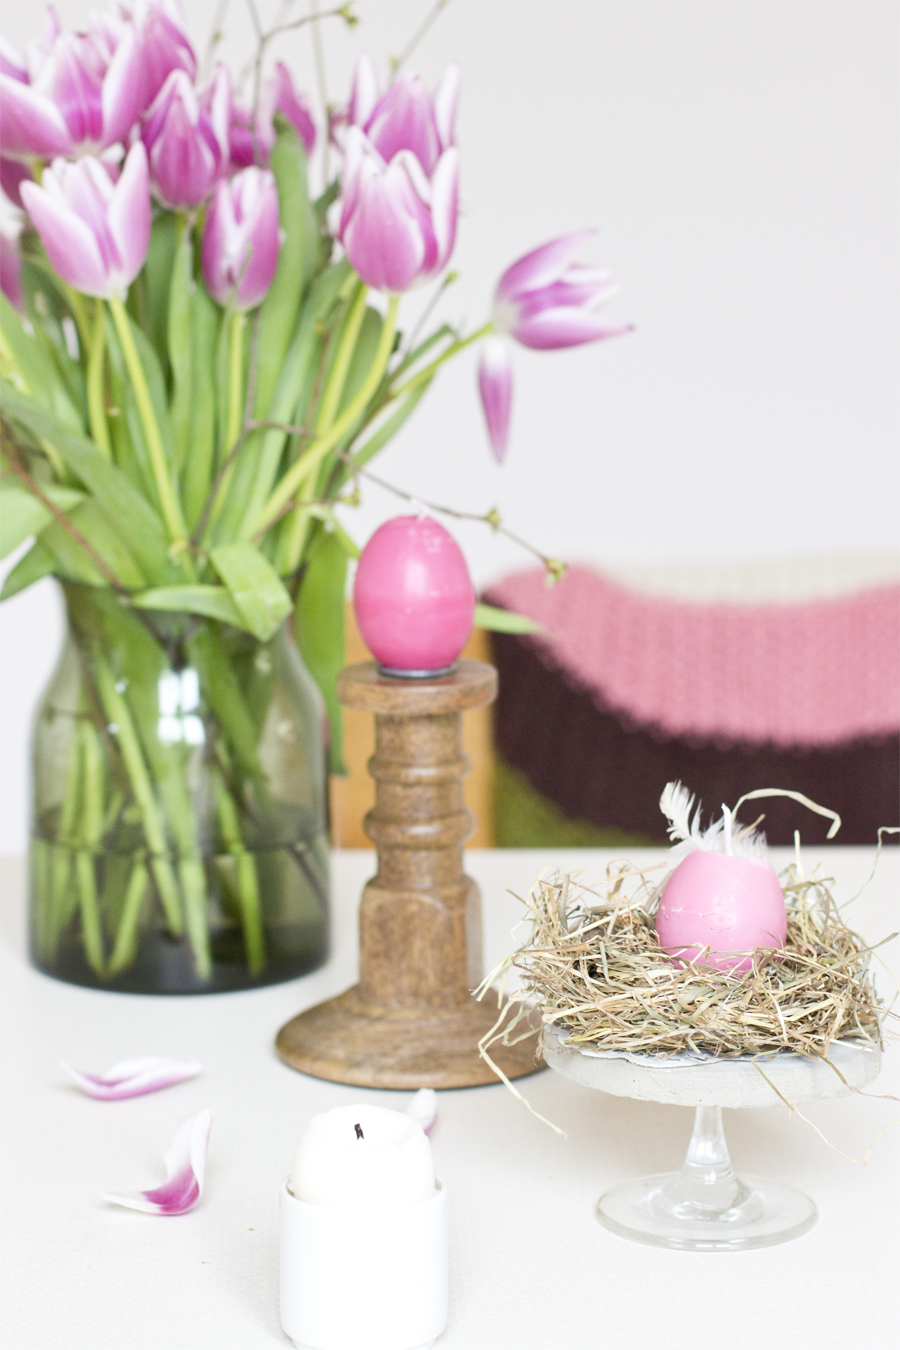
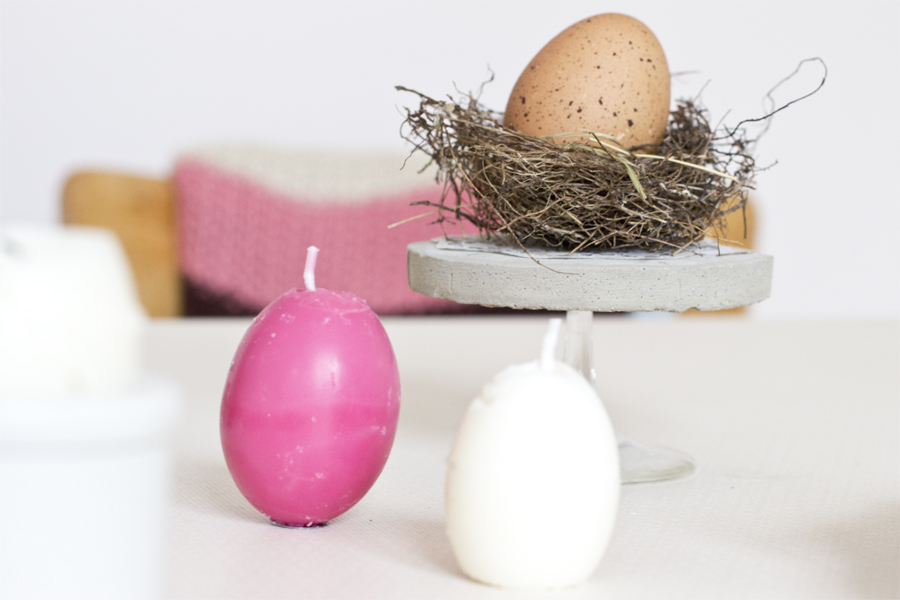
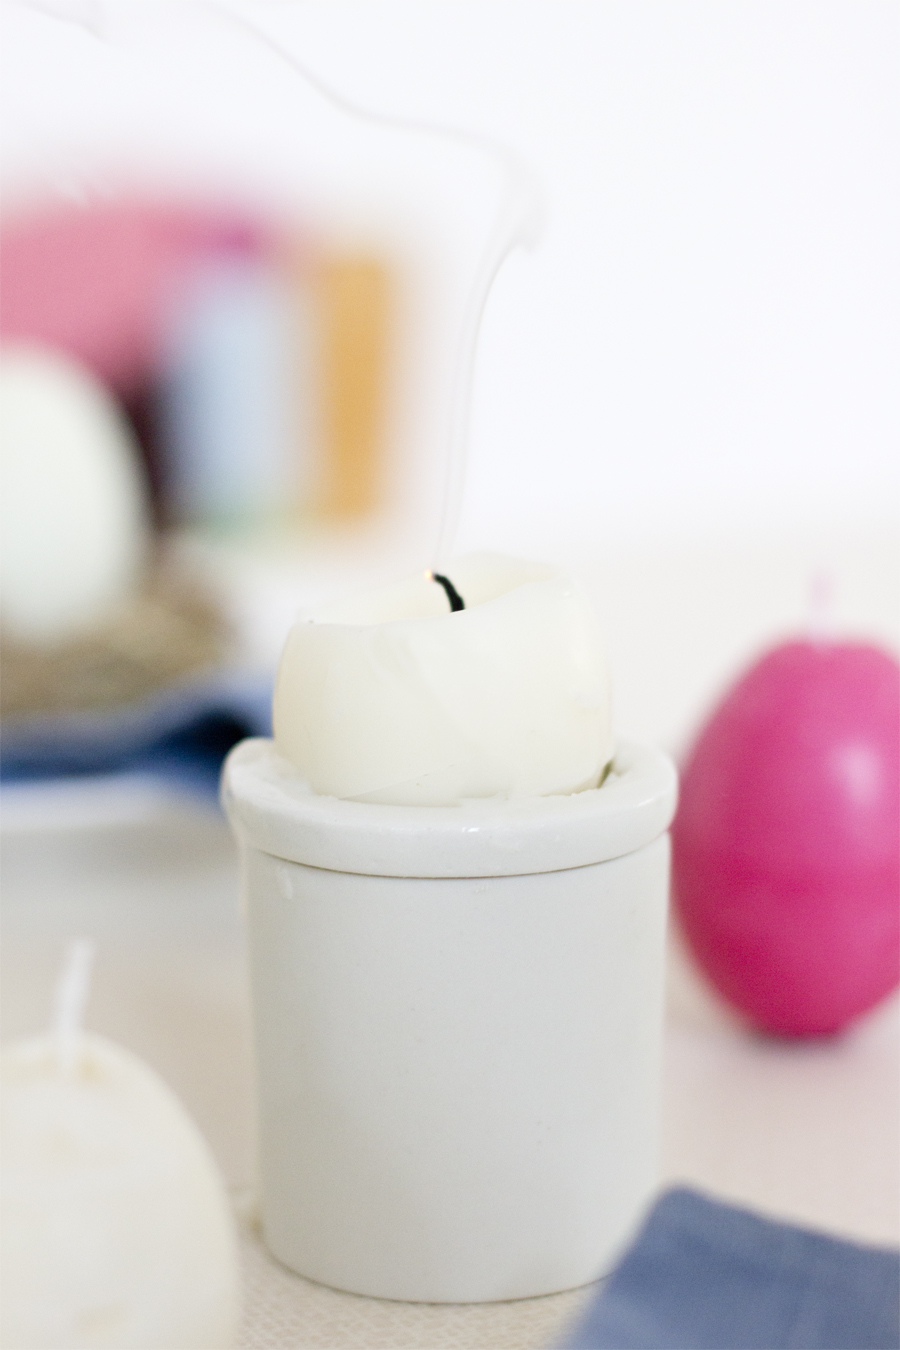
I guess I have a thing for pink at the moment. Look at this! The candle is only for decoration in its hay nest. I wasn’t planing on lighting it in there – please consider flammable objects around the candles!
I made the different colors with wax leftovers from an old candle. I made the first candle with the white wax I bought, the second one with just a little red wax mixed in and the darkest shade with much more of the red wax.
You could also make ombre candles with this technique – the sky’s the limit! I’m already looking for other ways to make creative candles. Any ideas?
Now. Carry on!


[…] I put the candles (you can make them using this tutorial) to a good use (it’s my birthday today after all!) and made this Easter decoration for the […]
[…] Look What I Made […]
[…] Look What I Made […]
[…] DIY egg-shaped easter soy wax candles. […]
[…] آموزش ساخت شمع تخم مرغی […]
[…] Handmade Easter Wax Candles Via […]
[…] 22. Egg-Shaped Soy Wax Candles […]
[…] Look What I Made […]
[…] I put the candles (you can make them using this tutorial) to a good use (it’s my birthday today after all!) and made this Easter decoration for the […]
[…] DIY Egg Shaped Easter Soy Wax Candles | Look What I Made […]
[…] Look what I made […]
[…] Look What I Made […]
[…] Image Source/Tutorial: Look What I Made […]