Have you subscribed to my newsletter yet? If so, you’ve seen a sneak-peak of this DIY project already. I made them last week and I have been so excited that I couldn’t wait to show it to you. I’m so smitten how they turned out – and they weren’t even hard to make. Those are the best DIY tutorials, right?
I even just created a Skillshare Class that walks you through the whole process of making these. Go check it out!

So step away from the computer and buy the ingredients you need to make this concrete and copper Easter bunnies today!
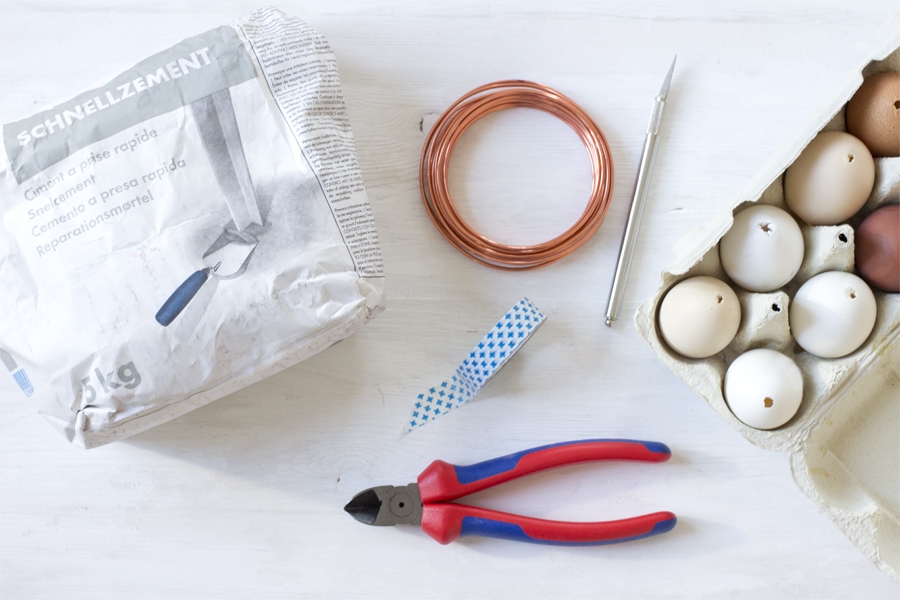
All you need is:
- quick cement
- copper wire
- blown-out egg shells
- Washi tape
- water-proof pen
- scalpel
- wire pliers
- a bowl and a spoon to mix the cement with water
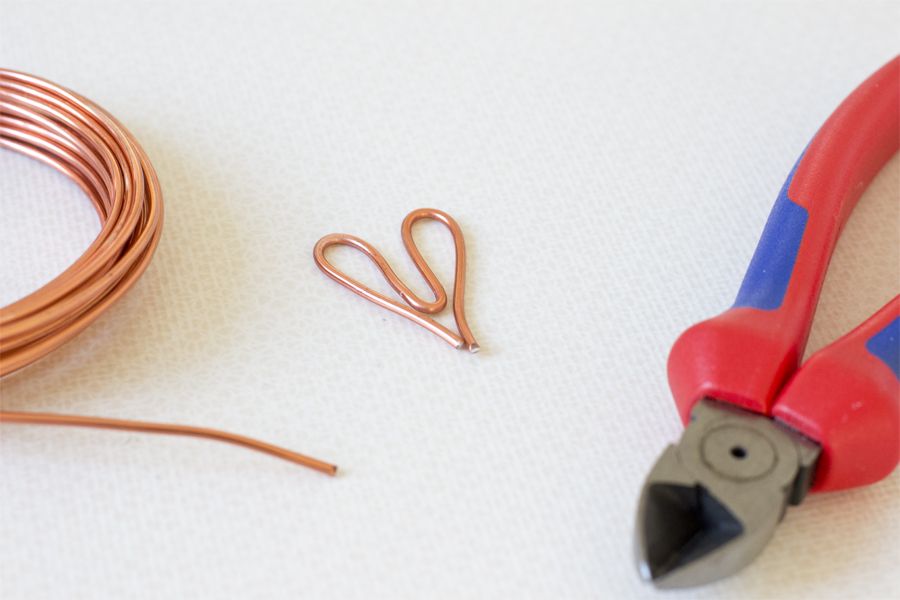
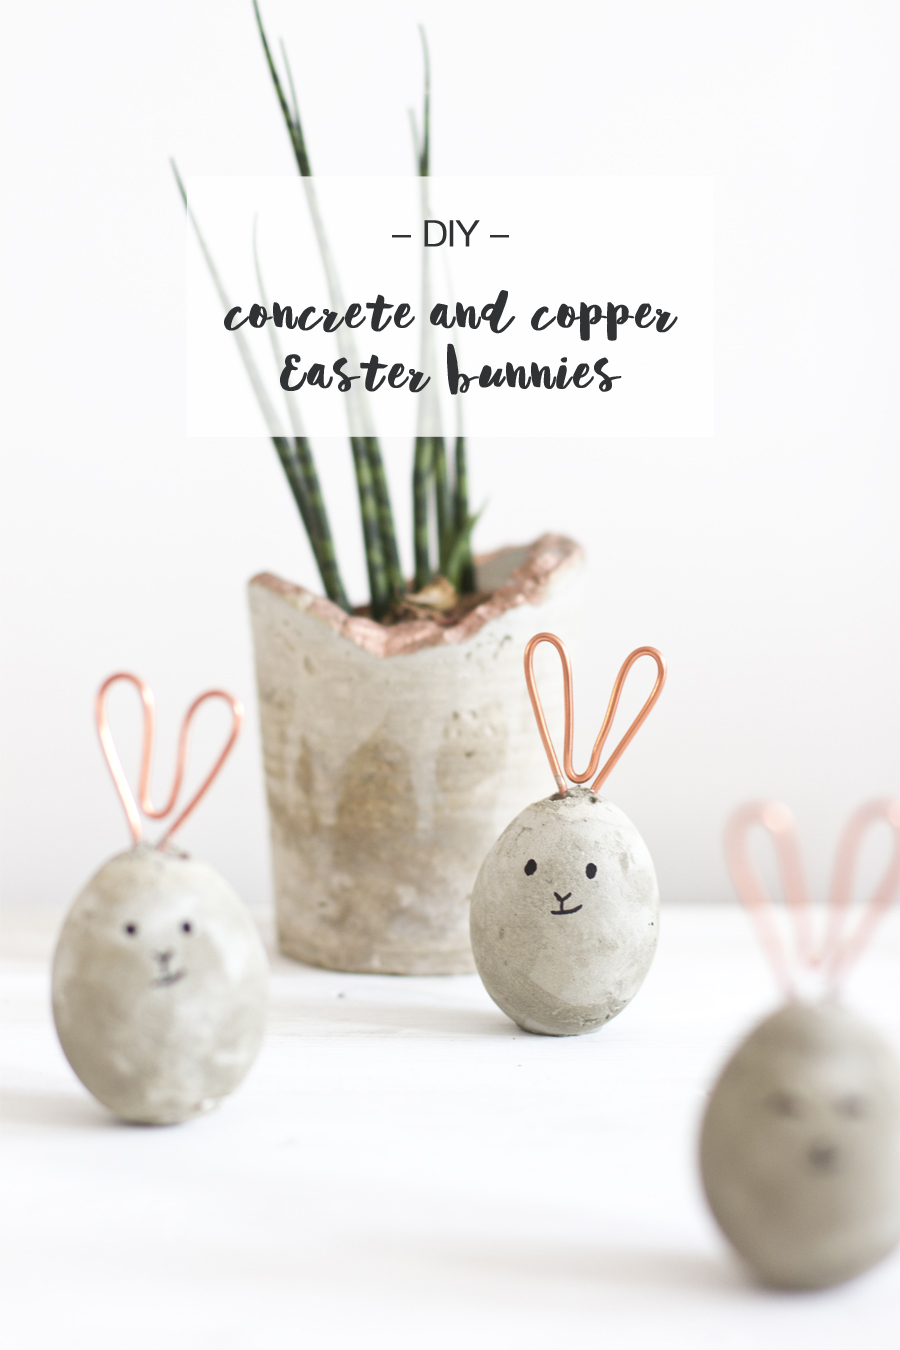
First we need to make the ears of the bunnies with wire. For this bend the wire into shape and cut it off with the pliers. Press the ends together so they are as close as they can be.
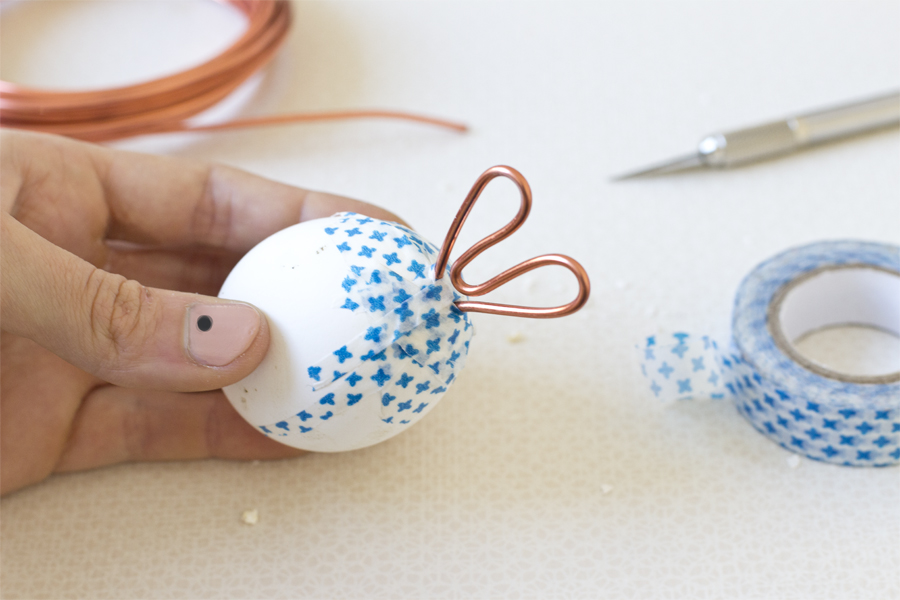
Next we prepare the egg shells which means we need to make the holes bigger. For this you’ll need the scalpel. The one on the top should be just as big that the ends of the copper ears fit through. The one on the bottom should be just as big that you can fit your little finger through.
Now stick the copper ears through the hole on the top and attach them carefully with some Washi tape.
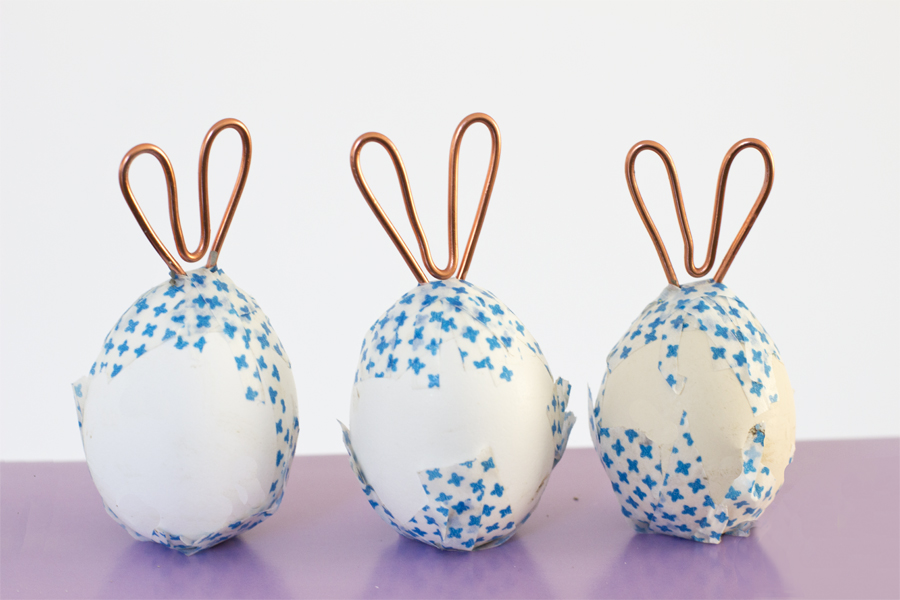
Mix the cement as it says on the back of the packaging in the bowl. Cut off some stripes of the Washi tape and put them aside. Fill the egg shells with the concrete (slowly pour it in). Close the hole on the bottom with the tape and put them on a piece of cardboard.
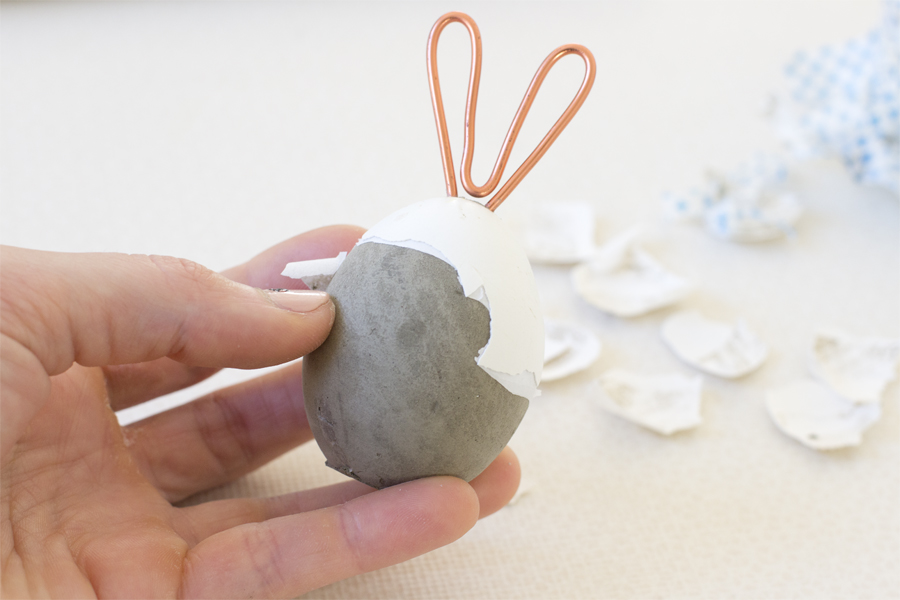
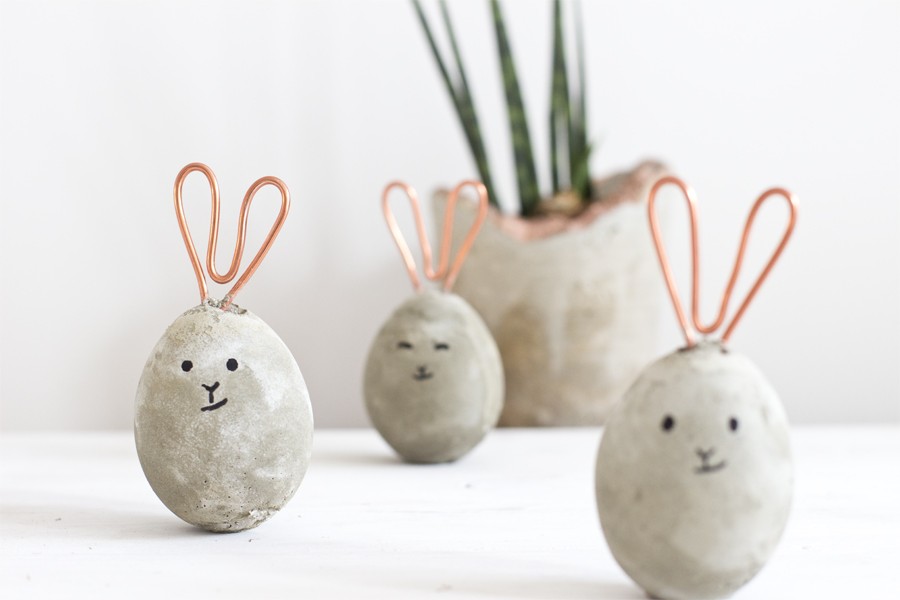
Now it’s waiting time. The cement will take about 24 h to harden. Then peel the egg shell off with your fingers or the scalpel and voilá! All you need to do is draw a face with the waterproof pen and you have your own concrete and copper Easter bunnies!

I put them on my sideboard with just one simple succulent that I had at home. I made the planter for this a while ago. You can find the tutorial for this concrete cups here.
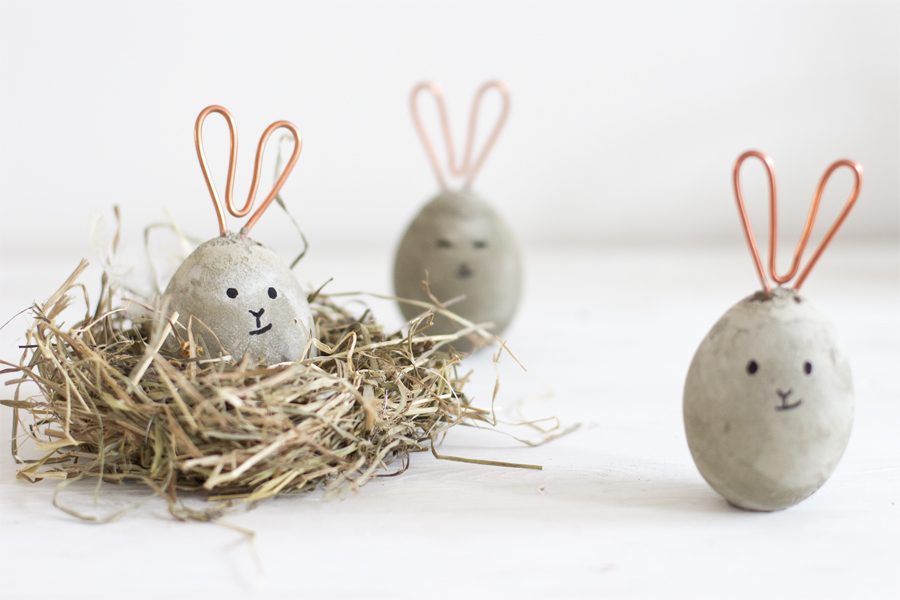
I also decorated them sitting in a little nest like this. Although it makes no sense that a little bunny sits in a nest other than it has an egg shape. Still looks cute though and not everything has to be logic in my home decor. Who’s with me?
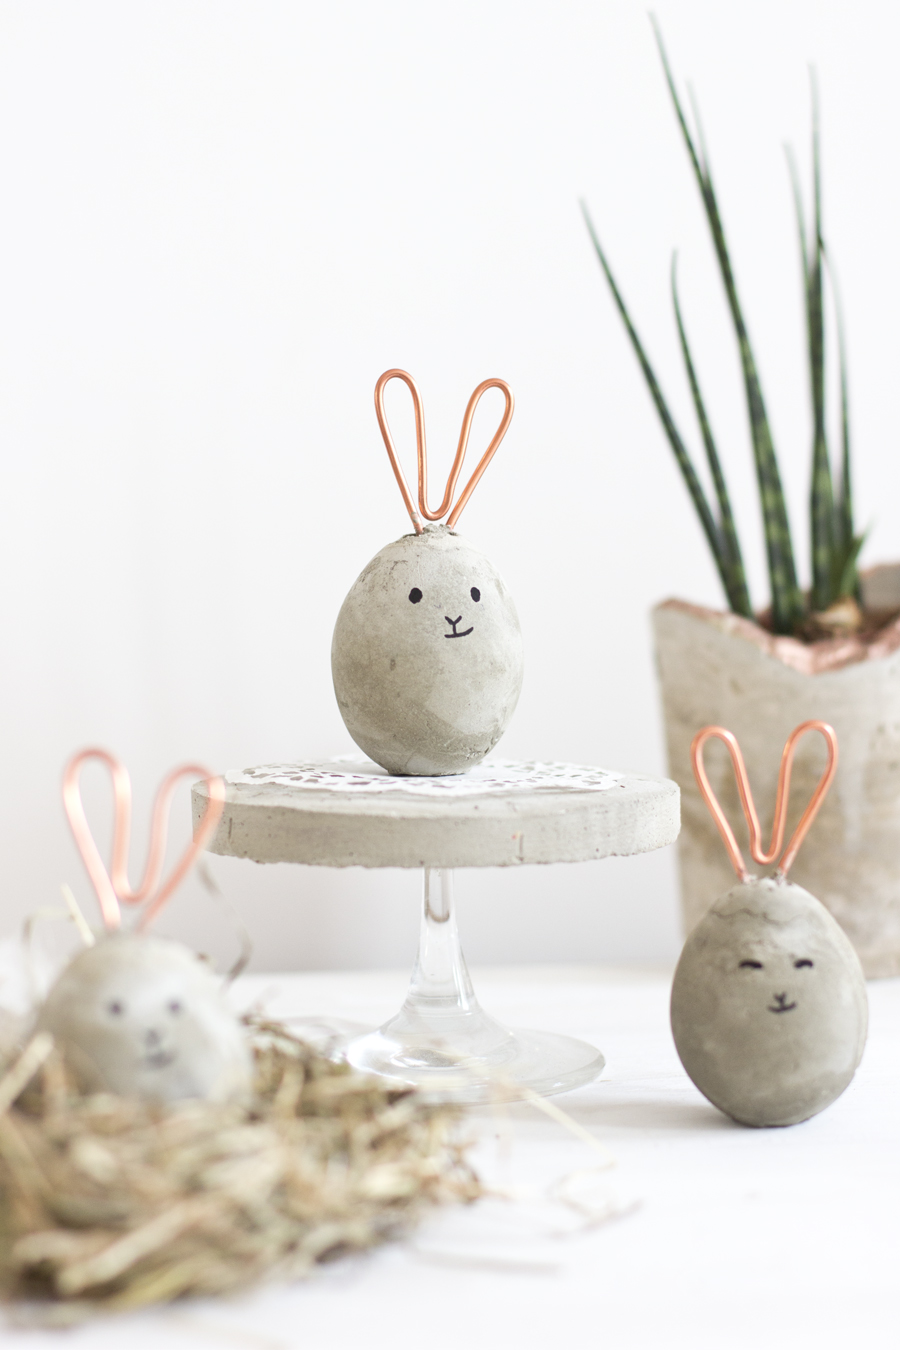
Oh and then another concrete project I made that has been quite popular ever since is this stand. I use it normally for a little plant but it was originally intended as a cupcake stand. But cupcakes don’t last that long in my surrounding that they need an extra display. Oooops.
If you wanna see one more tutorial with egg shells, head over here (in German but with lots of photos).
Do you have your Easter decoration ready? I’d love to see photos of how you decorate. Post it here in the comments or on my Facebook wall.
Now. Carry on!


I simply adore these little bunnies. Thanks for sharing.
thank you, ivory. i’m glad you like them. i’m also totally smitten.
Ah! These are so cute!! Love this idea.
Thank you, Alexis. This means a lot. 😊
[…] Row: Concrete Bunnies via LOOK WHAT I MADE – Origami Bunny via LOOK WHAT I MADE – Glitter Eggs via girl. Inspired. Lower Row: […]
[…] How adorable are these concrete and copper decorative bunnies from I Made This? […]
[…] Concrete and Copper Bunnies by Look What I Made […]
[…] worked with concrete. It’s not my first concrete DIY for Easter though. Remember these cute concrete Easter bunnies? A little trickier to make but worth the […]
[…] Concrete and Copper Bunny Eggs by Look What I […]
[…] DIY Concrete and Copper Easter Bunny by Look What I made […]
[…] might remember this DIY of mine for the concrete and copper Easter bunnies. They’ve been a big hit and had quite the resonance on the Internet. They are cute, I get it. […]
[…] DIY Wood Grain Folk Art Flower Easter Eggs | 4. Mottes Blog, DIY Crowned Bunny Easter Eggs | 5. Look What I Made, DIY Concrete & Copper Easter Bunnies | 6. We Are Scout, Easter Bunny Mini Eggshell Vase | 7. […]
[…] // 1: Aesthetically simple and functional wooden trivets / 2: You never know when it will rain, so these cute abstract umbrellas are great to make for a rainy day / 3: What about a fun DIY message board like this one to display litte Easter messages on? / 4: These DIY palm leaf napkins are so simple yet effectful, and fits perfectly on your dinner table on Palm Sunday / 5: I love the idea of creating a bag using a cushion cover. So smart! / 6: Breakfast in bed? This DIY hairpin leg & wood mini table is great / 7: And last but not least, how adorable are these concrete & copper Easter bunnies? […]
[…] 1 / 2 […]
[…] Sprawdź tutorial od Look what I made […]
[…] Concerte Copper Easter Bunnies | Look What I Made […]
[…] DIY Concrete and Copper Easter Bunny by Look What I made […]
[…] Look What I Made’s blog is full of easy DIY Easter decorations like these adorable concrete and copper bunnies. […]
[…] Source […]
[…] These Easter eggs still have a cutesy twist to them – but with them being made with concrete and copper adds a completely different new element to them entirely. You can see the complete DIY here. […]
[…] Conejitos de pascua de hormigón y cobre […]