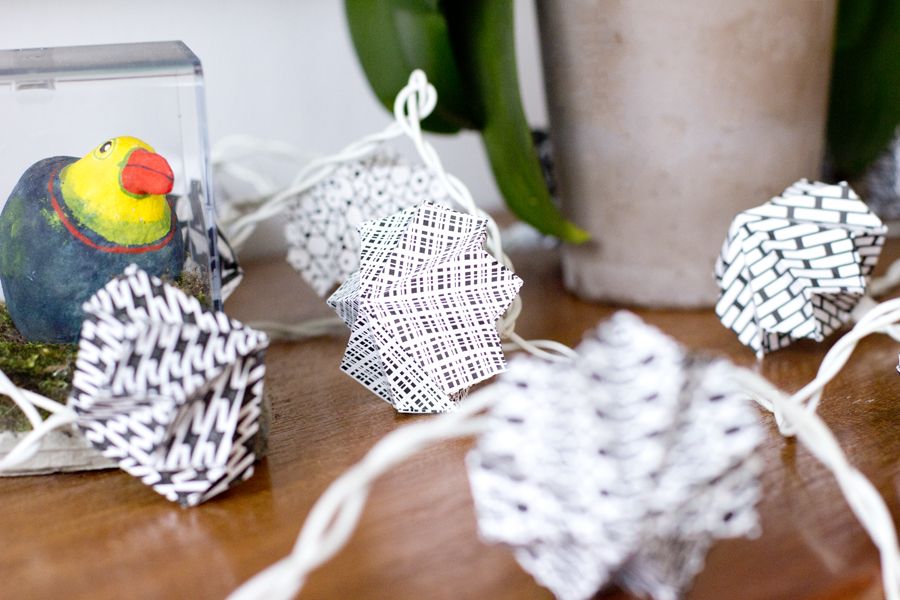
Yesterday I posted a little teaser of what I was working on on Instagram. I haven’t done Origami for quite some time. What surprises me more than you probably. I love Origami and I used to fold while watching TV, brainstorming on ideas or when I was upset. Yes, really. I think it’s the perfect combination of having busy hands while the mind is free to wander (or wonder which I do occasionally as well). So I was quite happy when I found this tutorial on how to make paper diamonds (there are not really diamonds but geometric things but doesn’t sound have as nice) over on Design and Form.
So there was the inspiration and this is what I made out of it: a light chain. You can’t have enough fairy lights in your home.
All you need is:
– paper
– scissors
– glue
– fairy lights
I thought the instructions over on Design and Form were quite helpful and easy but when I started to fold I found out I was wrong. Yes, me, the self-declared Origami-following-tutorial-master! The thing is that the paper they used was white only and mine is with a pattern on one side – and of course I wanted the pattern to be on the outside…

That you don’t make the same mistake, I took pictures of my own folding process, so you can see where the patterned side of the paper is.
Step 1: Fold the paper into half, open it up again, and fold it into the other half. It should have a folded cross in the middle. Now fold the corners together so that you have a triangle, open it up and fold it into a triangle the other way. There should be now a fold from each corner to the opposite corner and a fold from right through the middle of the paper forming a cross.
Step 2: Fold the sides in so that it becomes a smaller square.
Step 3: The open part of the squares should look your way and then fold the outer triangle in to the middle. Do this with all 4 sides.
Step 4: It should look now like this.
Step 5: Cut the triangles at the bottom off.
Step 6: Open one of the sides up.
Step 7: Fold the triangle in. Do this with all 4 sides.
Step 8: Now is should look like a plain simple triangle.
Step 9: Fold the corners in at the bottom. Do this with all corners. (It doesn’t matter which way you fold them – either looking all one way or not.)
Step 10: Now you should have a piece of paper that looks a bit like a diamond.
Step 11: Open up all the folds.
Step 12: Fold the little corners in as seen on the picture.
Step 13: Repeat Step 1 to Step 12 with another piece of paper.
Step 14: Glue those 2 pieces together.
Voilá! You have a nice geometric form. Now you need to fold just as much as the fairy light has lights…
… which is quite a lot.
Then cut a hole at one of the peaks (just big enough to push a little fairy light inside). And attach all the little diamonds to the lights chain.
The lights look great lying around at day and they look great lit up by day…
… and at night.
What more can you ask from a fairy light?!
Now. Carry on!


What a clever idea! These would be great as a garland for a bridal shower too 🙂
That’s true. I wanted to make them for my birthday. But too late (or much too early?!)
It’s never too late…or too early 😉
Schaut ganz toll aus, Sarah – und ich bewundere deine Geduld beim Falten. Aber ein bisschen hätte ich Angst, dass es “brandgefährlich” werden könnte, wenn Papier und Glühbirnchen der Lichterkette zusammenkommen?
Danke! Die Lichter sind LEDs und werden von daher nicht so heiß, dass sie das Papier entflammen können. Ich habe die Kette gestern 3,5 h brennen lassen und es ist nichts passiert.
I love the paper that you used! They look fantastic lit up. The patterns wouldn’t be printable, would they?! Wishful thinking perhaps 🙂
Thanks for the tutorial!
Unfortunately they are not printable. I bought the paper here: http://en.dawanda.com/product/52667819-supercraft-Origami-Papier-Schwarz-Weiss-Muster
Huch, dir kann man ja auch in Deutsch schreiben ;o). Superschön! Herzlichst, Anja
Hallo Anja,
ja, das kann man auch. Versteh ich fast genauso gut. 😉
I’m from buenos aires anda i was looking The tutorial to do this diamonds anda never cant find. .thank you to show us how we can do!!!!! Im so happy
[…] or make or buy or create, I look at this cute paper diamonds and smile. I made them actually for this LED garland. I took it down to hang up my newest creation but I really love this Origami paper […]
[…] always looking for something useful that I like in my home for months (or even years) like these paper diamonds that now hang over my table as ornament. Or this Advent calendar that I take out every year (not […]
[…] always looking for something useful that I like in my home for months (or even years) like these paper diamonds that now hang over my table as ornament. Or this Advent calendar that I take out every year (not […]