A friend of mine just recently asked me: what’s about girls and miniature stuff. Why do they like it so much? Well, what about it? Can’t we just appreciate the cuteness of stuff in small versions?! If it’s tiny I just have to have it. Like others like bling and glitter. I love miniature stuff.
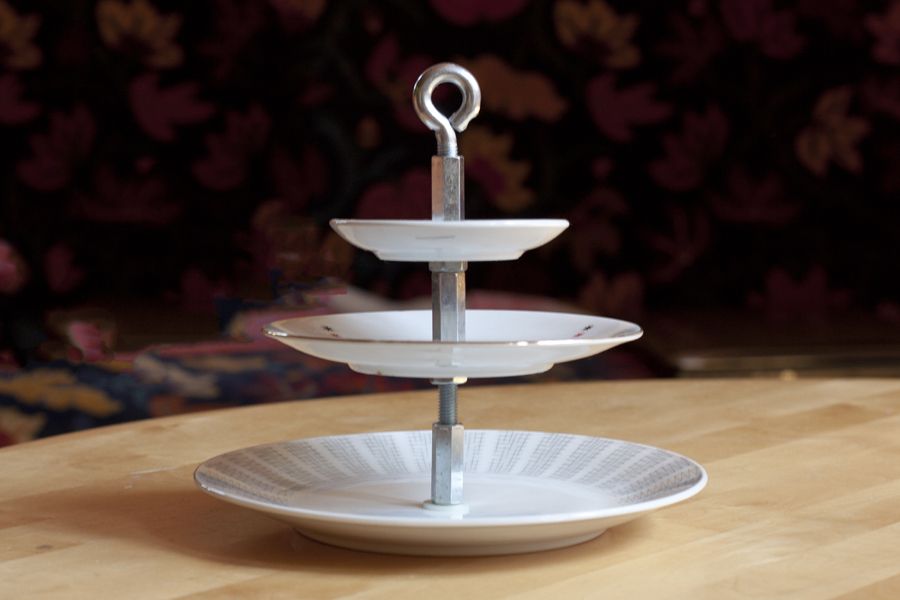
Unfortunately this miniature étagère is my sister’s – as you know from here. I really do have to think about giving away everything that I like too. (I made 3 étagères but gave all of them away. Silly me! Well at least I know how to make them and when I share it here, maybe somebody will gift me one… probably hopeless to drop a hint here.)
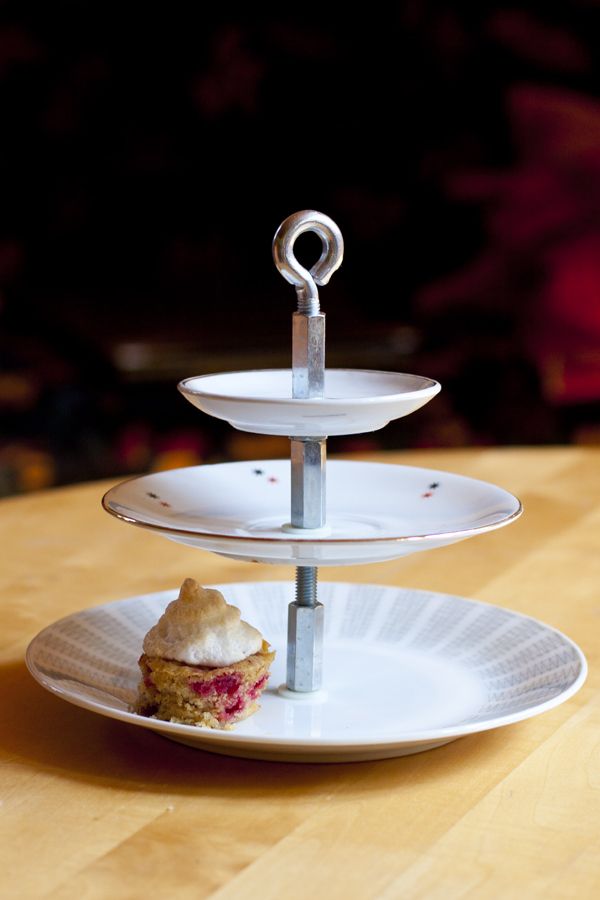
At least I could eat the miniature cupcake from this picture. Which I also made. Not for me. Again.
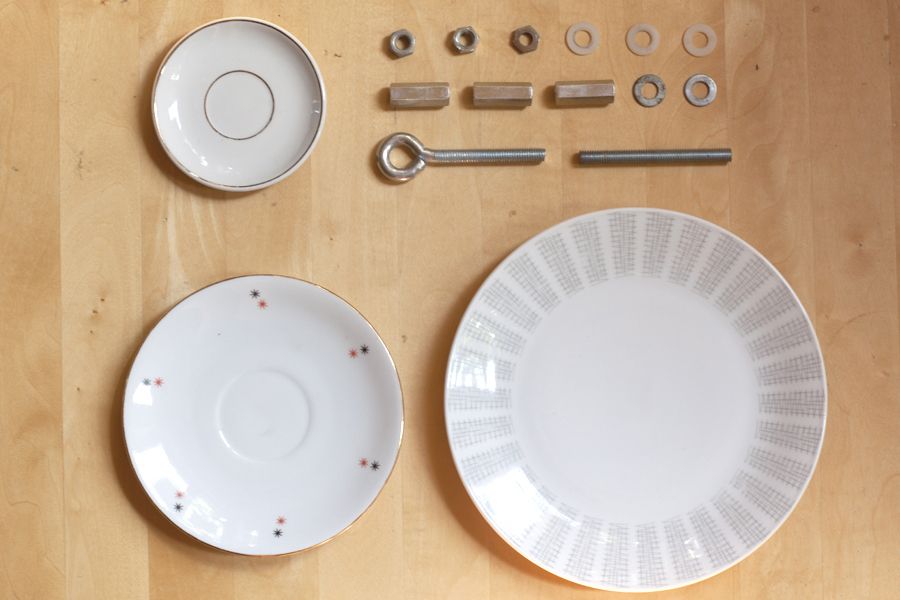
All you need is:
– 3 plates of different sizes
– a rod with thread (about 10 cm long)
– a rod with thread and loop (don’t know the actual name for this but I think the picture above helps)
– 3 long nuts
– 3 small nuts
– 5 washer (I used 2 metal ones and 3 plastic ones but you can use whatever you want)
– a power drill with a ceramic drill bit
1. The most tricky part: drilling holes into the plates. The ceramic will become hot quite quickly and we don’t want that since it will become cracks and break (trust me, I know from experience). The best way to do it is to put the plate into a bowl with water and drill it under water (please do make sure that no cable or engine comes in contact with the water! I don’t want to be responsible for any sudden deaths!) or if you’re lucky enough to have a stand for your power drill, that’s even better. Also you have to make sure that you drill straight from above.
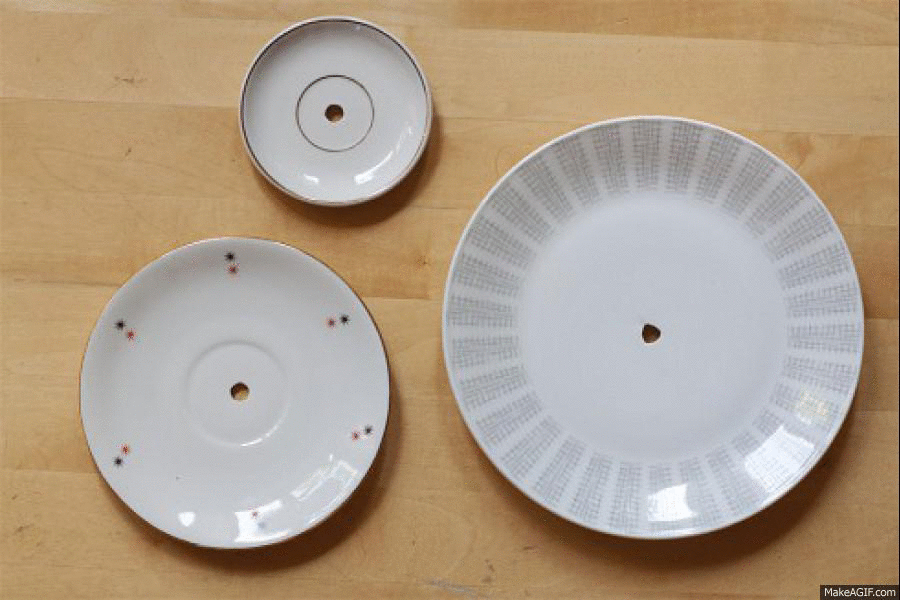
As you can see my holes aren’t perfectly round but that’s not to worry. As long as the cod fits through you’re good to go. Now we need to assemble it.
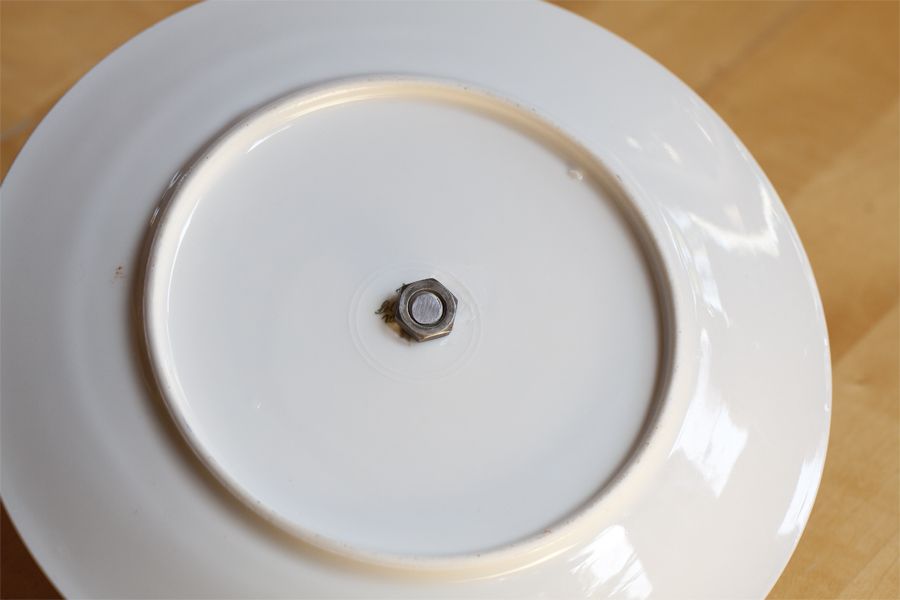
2. Take the biggest plate and put the rod (without the loop) through the hole and secure it with a small nut.
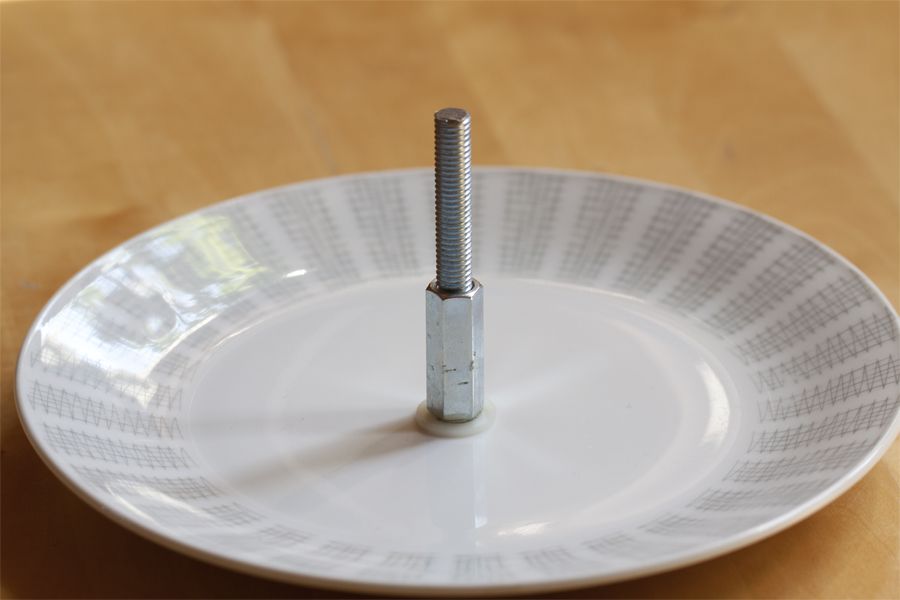
3. Put a washer with a long nut on the other side.
4. Screw a small nut on the rod and add another washer.
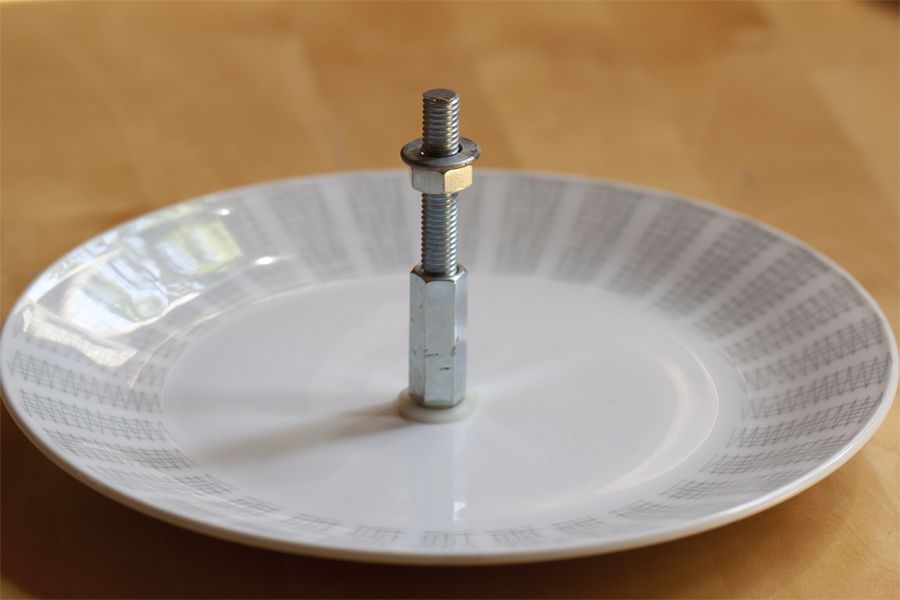
5. Add the middle plate, another washer and one longer nut (in this sequence). The longer nut should be open on the other end which means that the rod doesn’t go all the way through.
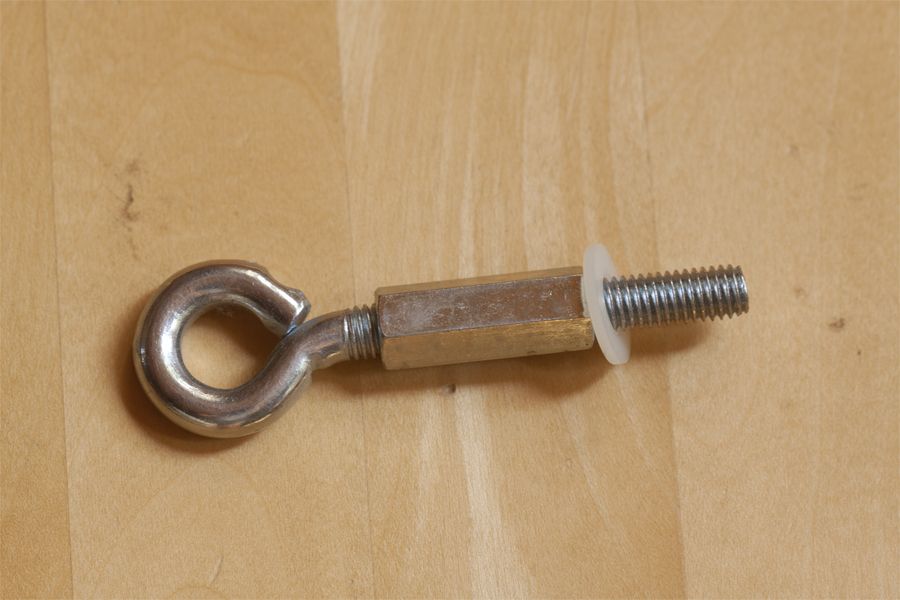
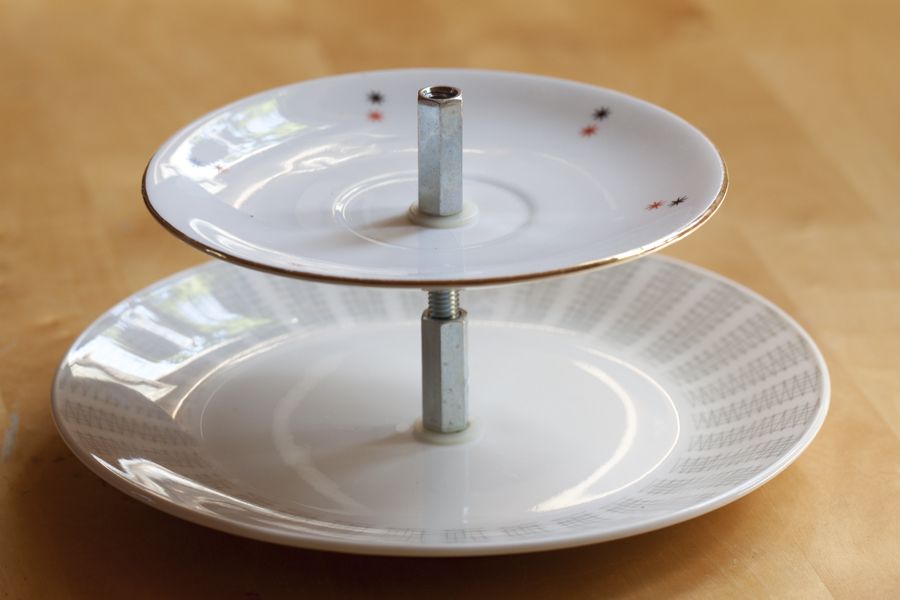
6. Now we need the cod with the loop, one longer nut, a smaller nut and one washer. Assemble as seen above.

7. Now just add the smallest plate, another washer and a small nut. A little piece of the rod should be free as in the upper part of the picture.
8. This is the last step: just screw the small plate to the two-plate-stand that we made before (isn’t this like building with lego?!) and you’re done!
Now look at this mini cake and/or jewelery étagère stand I made!

Now. Carry on!


[…] If you wanna know how, come by tomorrow and I show you the whole tutorial. […]
That is adorable. Thanks for the great instructions!
[…] Decorate it while it is still flat. I added studs on 2 of the envelope bags, drew dots on another and embroidered the forth with arrows like here. […]
[…] Onions 2| Lemon cushion 3| Cupcake Etagere 4| Cupcake Stand 5 |Kitchen Shelf 6 | Balm flower syrup and elder flower syrup (made with […]
[…] cute cake stand and easy to […]
[…] know that I always wanted to have an etagère building set. I looked everywhere and made then an etagère from scratch. So that was the end of a long project and supplies hunting. Until recently. When an etagère […]
[…] Mini Cake Stand with Hardware from Look What I Made […]
[…] been the third (or fourth?) time that I made an etagere (one even from scratch without a building set) and then one like this one but with upcycled and old plates. So why did I make one again? All […]